Adjustable Front Axle Blocks Installation
Adjustable Front Axle Blocks Installation
By Mike Chiocchio, Dick Pearson, Steve Sawtelle, Brian Winters
Copyright (c) 2007 - 2020 by Slot Car Corner L.L.C. - All Rights Reserved.
Introduction
The Shoreline Model Raceways club has several standard classes including a Nextel class based on Scalextric NASCAR/Nextel cars. The rules for this class also govern the Nextel class raced during New England Challenge (NEC) races. The class rules allow a fair number of modifications including using pieces of plastic to secure the front axle. One of the secrets to a fast Scalextric Nextel car is to keep the rear wheels firmly planted on the track when cornering. This is achieved by securing the front axle/tires at just the right height using small pieces of plastic (for more information, refer to these tuning tips). However, positioning and gluing the plastic which secures the front axle in just the right position can be a tedious, trial-and-error process. Some club members seem to have a knack for gluing the plastic front axle retainers in the right position; however, many others struggle. The difference becomes readily apparent on the race track. What was needed was an easier way for all club members to consistently position and secure the front axle properly. Ideally the solution would permit adjustments as well. Such a solution would help level the playing field and which in turn leads to closer, more exciting racing.
Adjustable Front Axle Mounts
The accompanying diagrams show some early drawings for an adjustable front axle mount designed specifically for 1/32 RTR plastic chassis. As you view the diagrams, note the vertical slots which allow the axle/wheel height to vary. Two set screws, one directly above and one directly below the axle, provide an easy way to set the axle/wheel height precisely where you want it. Note also the base of the axle mount is slightly larger than portion of the mount with the vertical slots - this provides more surface area to glue the mount securely to the chassis. Installation is straightforward and requires no special tools or skills. The next section provides illustrated step-by-step installation instructions.
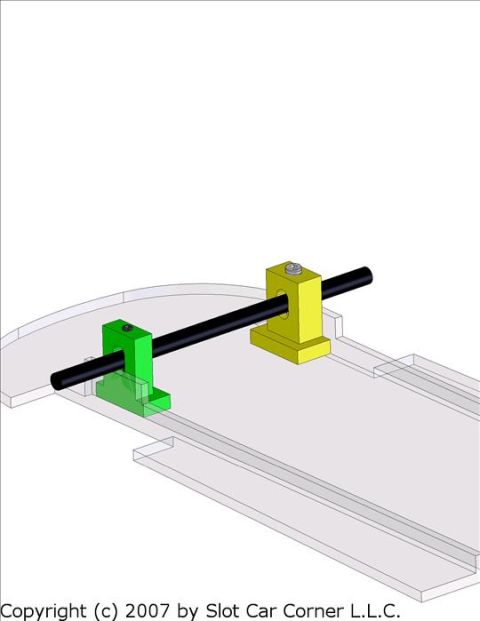
Here are some pictures of the actual mounts. Note the axle in the second picture is for illustration purposes only - it is NOT included in the retail kit. While the mounts were specifically designed for the newer Scalextric Nextel cars, they have been successfully installed on several other Scalextric, Slot.it (except HRS) and Ninco chassis as well.


Step-by-Step Installation Instructions
What follows are step-by-step instructions which describe and show how to install adjustable front axle mounts in a plastic RTR chassis. The mounts were originally designed for use with Scalextric NASCAR's; however, the accompanying pictures show the axle mounts being installed in a Scalextric Aston Martin DBR9.
Caution: Always wear safety glasses and follow all manufacturer's instructions and safety guidelines when using hand or power tools.
Start by removing the front axle and wheels.
Here is a picture of the Adjustable Front Axle Mount kit. It contains a pair of axle mounts and 2 pairs of 2mm set screws. Note one pair of set screws is slightly longer (5mm) than the second pair (4mm). For convenience, the set screws use the same hex driver as the set screws used on Slot.it (tm) wheels. Do not thread the set screws into the adjustable axle mounts at this time.
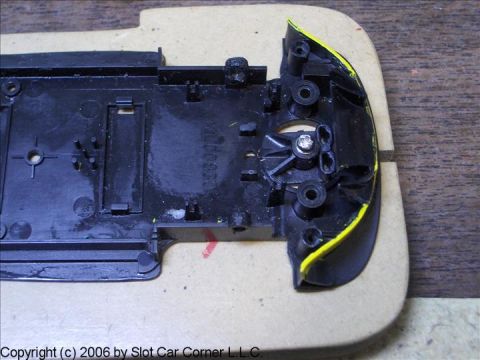
Place one of the adjustable axle blocks just inside the fixed axle block as shown. Carefully insert the axle through BOTH of the chassis' fixed axle blocks to properly align and position the adjustable axle mount.
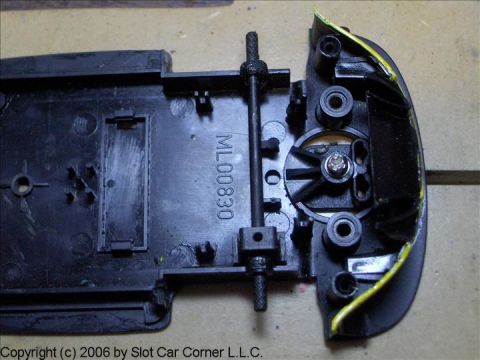
You can either hold the adjustable axle mount in place or "tack" it with a small drop of superglue or hot glue. Once the adjustable axle mount is temporarily secured, carefully remove the axle. Run a very small drill bit down through the top and bottom set screw holes (Tip: remove set screws first...) and drill a hole through the chassis.
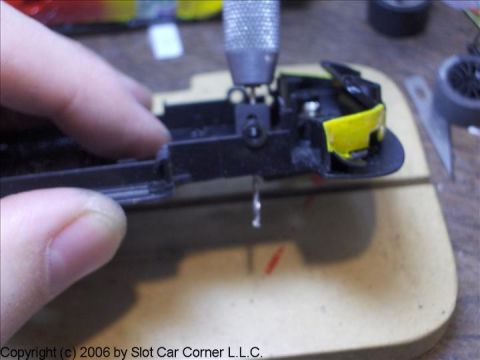
Caution: Be sure to use a drill bit which is smaller than the holes in the adjustable axle mounts. Use care not to nick/damage the threads when inserting the drill bit through the holes.
Remove the adjustable axle mount from the chassis and enlarge the hole slightly to ensure a hex driver can access the set screw on the underside of the block. Repeat for the second adjustable axle mount.
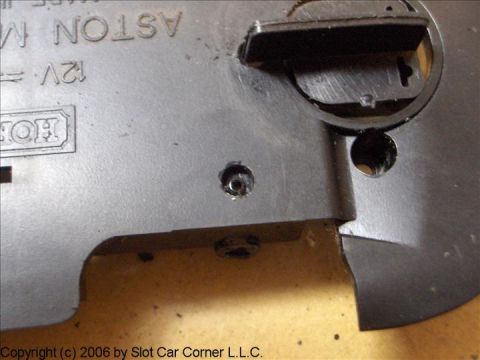
Use your front axle and fixed axle mounts to position both adjustable axle mounts. Double-check the hole in the chassis will permit access to the set screws on the underside of the mounts. Glue the adjustable axle mounts in place and let the glue dry thoroughly.
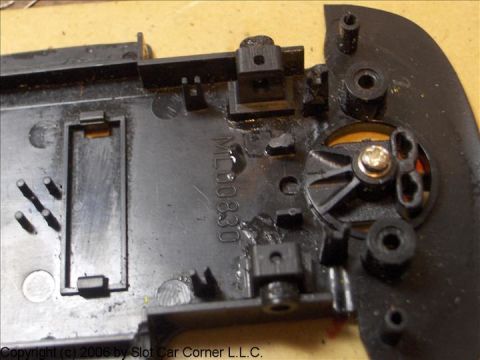
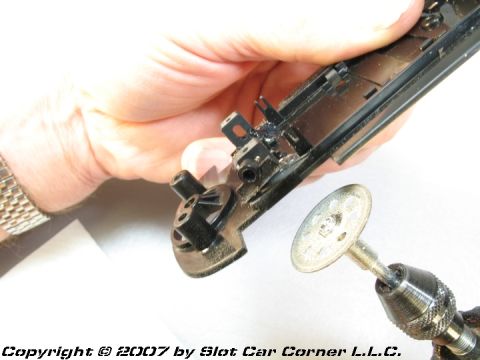
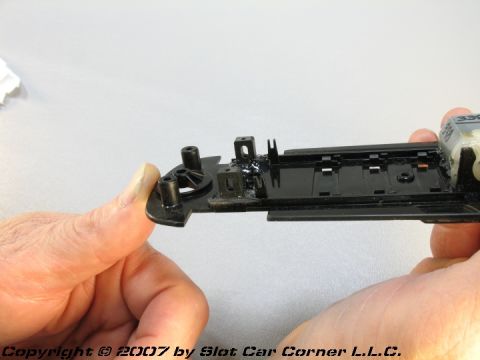
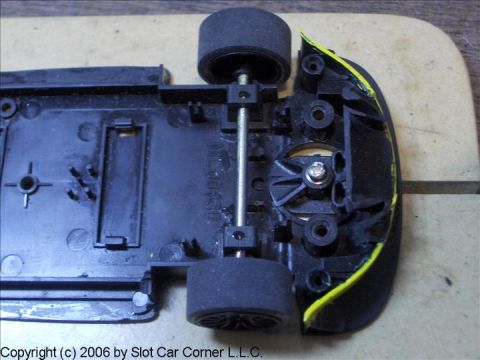
Once dry, remove the original fixed axle mounts from the chassis as these will not allow the axle to be adjusted vertically. They can be easily removed using an x-acto saw or a Dremel tool with a cutting wheel or grinding bit. (Note: Pictures shown are a Scalextric Nascar; however, same basic procedure applies to other plastic RTR chassis)

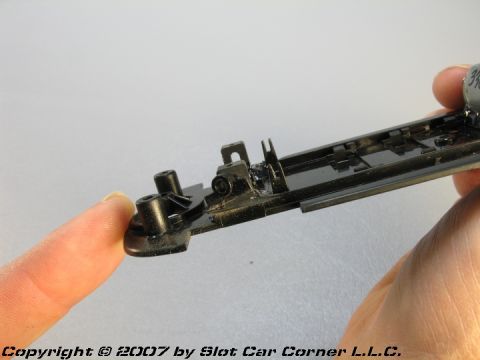
Install wheels and tires. Use the set screws provided in the kit to adjust height of axle so the chassis/wheels are riding at desired height. The longer (5mm) set screws should be threaded into the bottom of the mounts; the shorter (4mm) set screws should be threaded into the top of the mounts. Be careful not to tighten the set screws too much or they will cause the axle to bind (the top/bottom set screws should just barely touch the axle and there should be no noticeable friction when the wheels are turned. Place a drop of oil on the axle where is makes contact with the set screws to help ensure smooth operation (remember to do this periodically).
How Do I Adjust the Axle Height?
John Kroppe (aka "Moby Dick" on several online slot car forums) has put together an excellent tutorial describing how to use adjustable axle blocks to set the front axle height. John has graciously allowed us to share his tutorial with SCC customers and visitors - use this link to view the tutorial.
Summary
Proper front axle and wheel adjustment is very important with many 1/32 RTR plastic chassis. The adjustable front axle mounts shown in this article make it much easier to achieve proper adjustment than other methods (e.g. gluing plastic struts). If you initially set the axle/wheel height and the setup block (or on track testing) subsequently shows it is not quite right, making further adjustments is very easy.
Note: For your convenience, the high-quality components shown in this how-to article are available from the Slot Car Corner Online Store.
Special thanks to Brian ("Brainslot") Winters for helping me take an idea and turn it into reality and Mike ("Smokeio") Chiocchio and Dick ("nhdungeonracer") Pearson for their assistance testing the initial prototypes. Mike also took many of the pictures which accompany this article.
